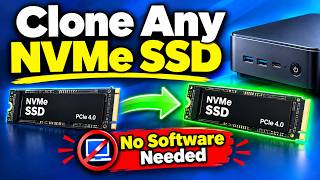
How to Clone Any NVMe SSD to a Larger Drive (No Data Loss)
When your work or entertainment data starts to hit the limits of your current SSD, a simple upgrade is often the best solution. Instead of reinstalling your operating system and apps from scratch, you can duplicate the entire drive onto a larger one. With a few tools and a clear step‑by‑step plan, you’ll keep everything exactly as it is—no data loss, no downtime.
1. Why Clone Instead of Reinstall?
- Speed: A clone copies bits directly; it takes minutes instead of hours.
- Continuity: All user accounts, settings, and applications stay intact.
- Peace of Mind: Your data is preserved on the original drive until the clone is verified.
2. Gather Your Essentials
- New NVMe SSD: Bigger capacity, same form factor (2280).
- USB‑to‑NVMe adapter or external enclosure for the new drive.
- Laptop or desktop that can boot from a USB drive.
- Backup: Even though cloning is safe, always keep a recent backup of important files.
3. Check the Current Drive
- Health Check: Use a tool like CrystalDiskInfo (Windows) or smartctl (Linux/macOS) to confirm the source SSD is healthy.
- Partition Overview: Open Disk Management (Windows) or Disk Utility (macOS) to note how many partitions exist and their sizes.
- Free Space: Verify the new drive has at least the same total capacity as the used space on the source.
4. Pick a Cloning Tool
Two reliable, free options are
- Clonezilla – open‑source, runs from a bootable USB.
- Macrium Reflect – free Windows application with a friendly GUI.
Both support NVMe and will copy every partition, boot flag, and hidden data.
Clonezilla Method (Recommended for Linux/macOS users or cross‑platform comfort)
- Create Bootable Media: Download the latest Clonezilla ISO and write it to a USB stick using Rufus or dd.
- Boot into Clonezilla: Restart your computer and select the USB drive from the boot menu.
- Choose “device‑device”: This copies one disk directly to another.
- Select Source: Pick the original NVMe SSD.
- Select Target: Pick the new NVMe SSD that is connected via the USB adapter.
- Confirm: Review the summary. Clonezilla warns if the target is smaller – double‑check!
- Start Cloning: Let Clonezilla copy the data. It will replicate partitions, boot sectors, and hidden OEM data.
- Finish and Reboot: Once done, shut down the system, replace the old SSD with the new one (or leave it connected if you plan to keep a backup). Boot from the new drive; everything should work exactly as before.
Macrium Reflect (Windows‑only)
- Install the free version.
- Open the main window and click “Clone this disk.”
- Pick the source (your current NVMe) and the target (the larger NVMe connected via USB).
- Adjust partitions if you want to use the full capacity of the new drive.
- Start the clone and wait for the progress bar to finish.
- Swap drives or set the new drive as boot priority in BIOS.
5. After the Clone
- Boot Test: If you keep both drives, boot from the new one and confirm all programs launch.
- Verify Disk Usage: Open Disk Management or Disk Utility and see that the new drive now shows the larger usable space.
- Secure the Old Drive: Either keep it as a backup or format it for additional storage.
- Update Backup Strategy: Add the new drive to your regular backup routine.
6. Common Pitfalls & Quick Fixes
| Issue | Fix |
|---|---|
| Boot fails after clone | Enter BIOS and set the new SSD as the primary boot device. |
| Unused space remains unallocated | Use Disk Management or a third‑party tool to extend the primary partition. |
| Clone stopped midway | Ensure the USB adapter is reliable; try a different port. |
7. Final Tips
- Double‑check the drive sizes before starting; a smaller target will abort the operation.
- Leave the original drive connected until the clone is verified to prevent accidental data loss.
- Keep an external backup of critical files, especially if you’re upgrading for the first time.
- Use a reputable adapter; cheap adapters may not support NVMe speeds and could corrupt data.
Cloning an NVMe SSD is straightforward once you have the right tools. The result is a seamless transition to a larger drive with no interruption to your workflow or media library. Happy upgrading!